How to Carve a Turkey
The most important thing to remember when carving a turkey is that your technique doesn't really matter, and how the carved turkey looks doesn't really matter, as long as you get the turkey to your hungry guests. That said, wash your hands and let's get started:
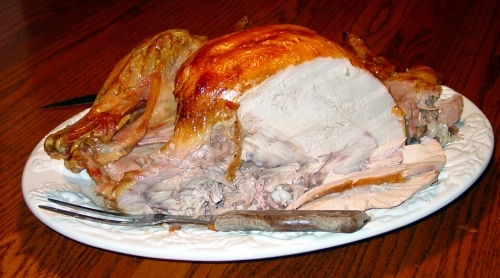
Tools
Well, you have to have a knife, and a nice carving fork or meat fork is good, but not an absolute necessity, and a sharpening steel is useful, but again, not a necessity.
Knife
The best type of knife to have is a carving knife, or a slicing knife, with a straight edge, not serrated. Your knife needs to be sharp, so a knife made of sharpen-able metal, usually high carbon steel, is preferred. A sharp smooth edged knife will make a smooth cut through your meat, while a serrated knife will saw through whatever you are cutting and not make as clean a cut. A serrated knife is better than a dull straight edged knife though, as the serrated knife will break through crisp turkey skin and into the meat while a dull knife may have trouble breaking through crisp skin. Think about slicing tomatoes, many people prefer serrated knives for this, because the little points on a serrated knife will break through the skin, while a straight edged knife that is dull will not break through the skin, but a sharp straight edged knife will slice much more cleanly and smoothly through tomatoes... and turkey.
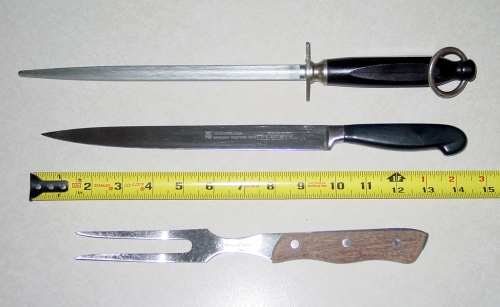
Carving Tools
You don't need the tape measure
Your knife needs to be long enough so that it can slice the full length of your turkey breast, so an 8 to 12 inch (20 - 30 cm) blade is needed on your knife. The longer blades can be used on both large birds and small, so they are preferable.
Some carving or slicing knives are relatively narrow and have a pointed tip. While this is not terribly important for carving turkey, it is useful when cutting around bones in the center of a roast or ham. You can push the point of the knife in beside the bone and work it around to separate the bone from the meat and remove the bone. If you are purchasing a new knife for carving, then look for one with a pointed tip. For some reason these longer 10 or 12 inch slicing knives with a pointed tip have become a bit rare, so a Spanish Ham Knife might be the best all-purpose tool.
I should also mention electric knives. An electric knife is basically two serrated knife blades side by side sawing in opposite directions. If you want to use an electric knife, then go ahead, electric knives work quite well, but I still prefer a nice sharp carving knife.
Fork
A carving fork that matches your knife is a nice touch, but it is not important that it match, or that it be a carving fork, a large serving fork, or even a table fork will work. The fork is mainly used to stabilize the turkey while cutting, and also used to serve the turkey. If, when you are slicing, you slice too far, it is better to slice into a fork being used to steady the turkey, rather than a hand used to steady the turkey.
Often, it is easier to use your hand rather than a fork for bending back a leg or wing at the joint, or for stabilizing the turkey. Since the turkey is hot, kitchen gloves, or an oven mitt could be used, but that really isn't as elegant as using a carving fork, or your bare hand. If you are using your hands, gloved or bare, for any of this, you need to be quite careful so that you are not carving any human meat along with your turkey.
Sharpening Steel
The importance of having a sharp knife cannot be overemphasized. Sharp knives are safer than dull knives, which may be counter-intuitive. Here is what happens: You are using a dull knife to cut something that has a hard crust or skin, or other outer covering. Your dull knife doesn't readily break through this outer covering, so you use more pressure and force on the knife, and then, rather than cutting into that nice loaf of bread (or whatever), the dull knife slips off the hard crust, and finds some of you. Since you are nice and soft and don't have a hard crust, the dull knife cuts quite well. If you use a sharp knife, you can use less force to cut and cut far more accurately, so you are less likely to have accidents. You should not need to use much force to slice your turkey, it should be easy to cut, let the knife do the work. Oh yeah, cut away from yourself, rather than towards yourself. That bare hand you have stabilizing the turkey should not be below the slice that you are cutting. Ummm... cut away from others too.
So having a sharpening steel to sharpen the knife that you are going to use is a good idea. I'll have to create a page about sharpening knives with a sharpening steel to discuss how to do this. Having a sharpening steel that matches your knife is a nice touch, but again, not a necessity.
In general, you don't sharpen serrated knives with a sharpening steel, so don't try that. If however, you are using a serrated knife, and you have a method to sharpen it, then by all means do so. You should sharpen your knife just prior to carving the turkey, so you know it has not been dulled by anyone or anything.
Before Anything Else
Wash your hands, you will probably be touching the food and it is a good idea to be as sanitary as possible. Sharpen your knife. Remove any plastic, metal, or string that has been used to hold the ends of the drumsticks together while it cooked. Sometimes the ends of the drumsticks are held together by a band of skin, if that is the case, then just cut through that skin to free the drumsticks. Actually, I recommend cooking your turkey without the drumsticks being held together by any device or skin, see How to Cook Turkey for a more detailed explanation.
What Order to Carve your Turkey?
Most turkey carving instructions will tell you to carve off the legs and wings before carving the breast, and that is okay, but not necessarily how you will do it.
Since the white breast meat often finishes cooking before the dark meat then it is ready to be carved before the legs, thighs, and other parts have finished cooking. If your breast is done before the dark meat, then I recommend removing the breast when it is finished cooking, and maybe the wings, and putting the rest of the turkey back to get completely cooked. If it happens that your dark meat is done at the same time that your white meat finishes cooking, then sure, use the traditional order of legs including thighs, wings, and then breast.
Let it Rest
If you are not removing the breast meat first, then, after you take the turkey out of the oven, you should let it rest for 20 to 35 minutes. This allows the outside of the turkey to cool somewhat for easier handling and carving. Resting time also gives the meat (proteins) time to relax and allows the juices in the meat to redistribute, resulting in tender juicy meat, softer skin and thus easier carving. Any juices that drain from the bird should be used for making gravy. If you are removing the breast to put the remainder of the turkey back in to finish cooking, then no rest time is called for before removing the breast. If you have stuffed the turkey, then after letting your turkey rest, remove the stuffing to a serving bowl.
Breast First?
Removing breast half.
If the turkey breast has finished cooking and the dark meat has not, and you have decided to remove the breast and put the rest of the turkey back in to finish cooking, then you can immediately remove each breast side in one piece, with no resting time.
Breast ready to be sliced.
Now slice in along the ribs of the turkey, horizontally, low on the turkey behind the leg where the breast meat is quite thin. You make this cut all along the side of the turkey.
Then, stabilizing the turkey with your fork, you slice down from the top of the turkey, just beside the breast bone (sternum), and guide your knife along the bones slicing down to the horizontal cut. This allows you to remove all the breast meat in one piece from one side.
You then repeat this process on the other side, so you have the entire breast, in two sections. At this point you can, if necessary, put the rest of the turkey back in, to finish cooking, and serve the breast halves.
When serving, the breast halves can be sliced cross-ways, across the grain of the meat, perpendicular to the way you would normally slice the breast. This gives you smaller somewhat triangular shaped slices of white meat.
Drumsticks and Thighs
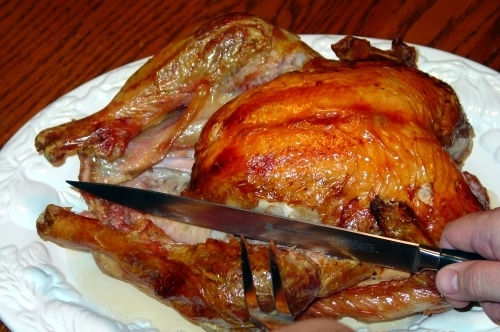
Cut through the skin between leg and the body of the turkey
The key to removing legs and wings is to find and cut through the joints. You won't be able to easily cut through bone, but it should be easy to cut through the joint, between the two ends of the bones. To find the joint you bend back the leg or wing and cut through the skin and meat where you think the joint will be. Then bend it back more to expose the joint. Once you can see the white cartilage of the joint, you can find the right spot to continue cutting to remove the leg or wing.
There are two ways to remove the leg: removing the entire leg, drumstick and thigh in one piece, then separating the drumstick and thigh, or removing the drumstick by itself, then removing the thigh by itself. I prefer the second way, as I find that to be easier.
Use your knife to separate the skin between leg and the body of the turkey. Lift the drumstick portion of the leg a little and cut into the joint, between the drumstick and the thigh, to expose the bone and cartilage at the joint. Bend the drumstick back even more so you can see where you are cutting. Cut between the two pieces of white cartilage at the joint. You may need to cut a little, then look at the joint again to be sure that you are cutting between the leg and thigh bone joint. Cut severing the ligaments of the joint, and then cut through the rest of the meat to remove the drumstick.
Now you need to do almost the same thing to remove the thigh. Bend the thigh out away from the rest of the turkey, cut through the skin and meat holding the thigh to the body. Bend the thigh out even more, cutting at the angle to expose the joint. Cut through the ligaments of the joint, and the rest of the meat to remove the thigh. You can now move on to the wing on this side of the turkey, or remove the other leg on the other side of the turkey.
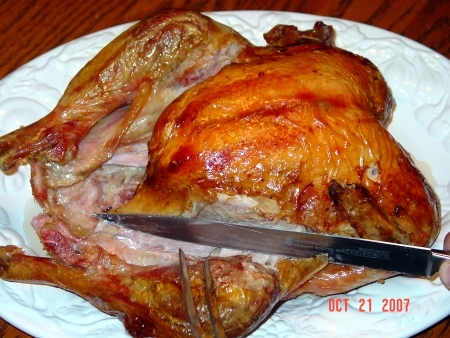
Cut through the skin between leg and the body of the turkey
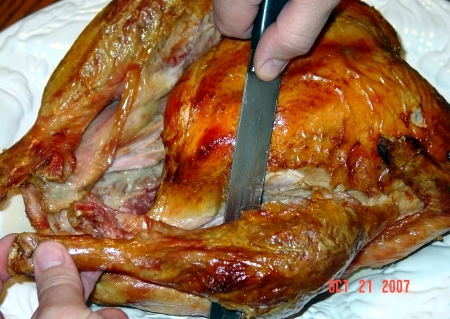
Cut into the joint, between the drumstick and the thigh
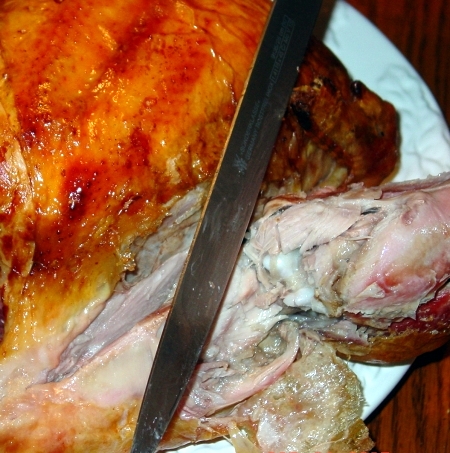
Bend the leg back more to find the joint
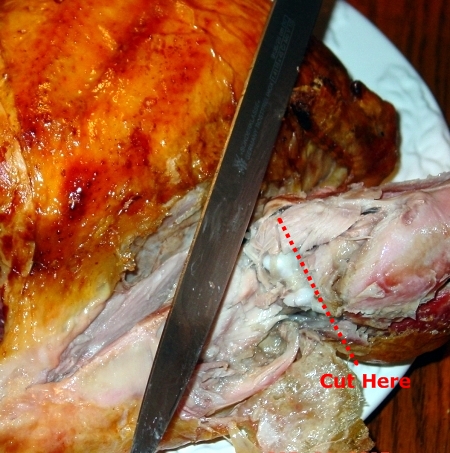
Cut through the joint
between the bone ends
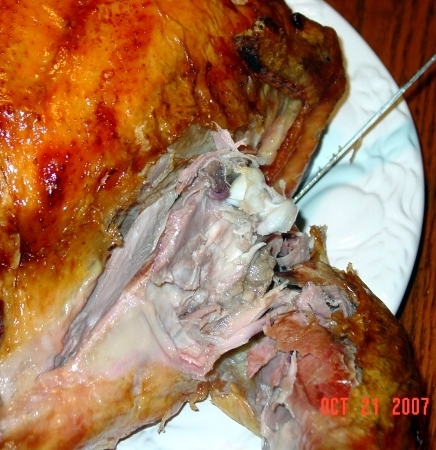
Remove the drumstick
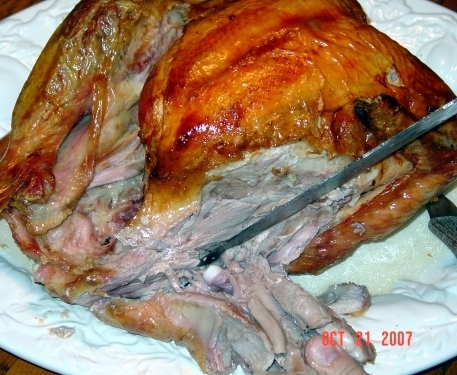
Remove the thigh in the same manner
Wings
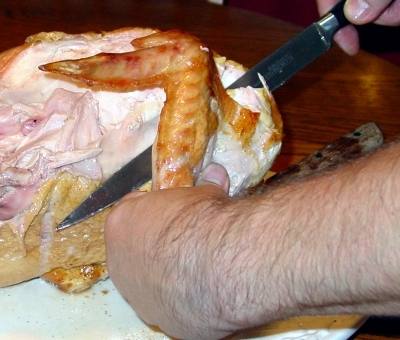
Cut through the joint to remove the wing
You remove the wings in a manner that is very similar to the legs. Bend the whole wing out away from the body of the turkey. Cut through the meat into where you think the shoulder joint is. Bend the wing out more, and look for the joint, then carefully cut through the joint and the rest of the meat to remove the wing.
Slicing the Breast while it is on the Turkey
Stabilize the turkey with your fork. Cut parallel to the rib cage using long slices, going with the grain of the meat. Try to cut even slices, not thick on one end and thin on the other. Slice until you finish one side of the breast, putting the slices on a serving platter.
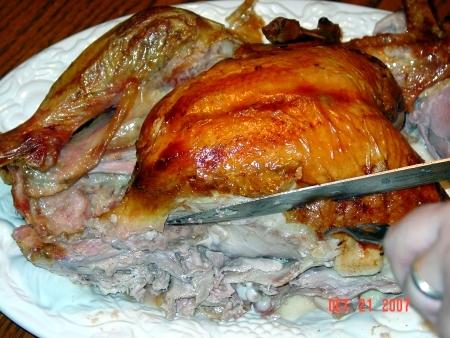
Stabilize the turkey with your fork
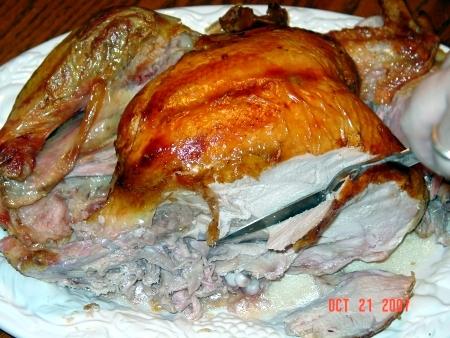
Cut parallel to the rib cage using long slices
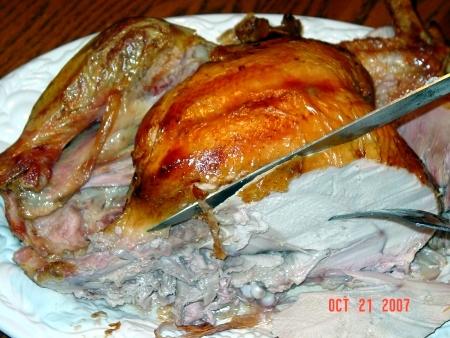
Cut even slices
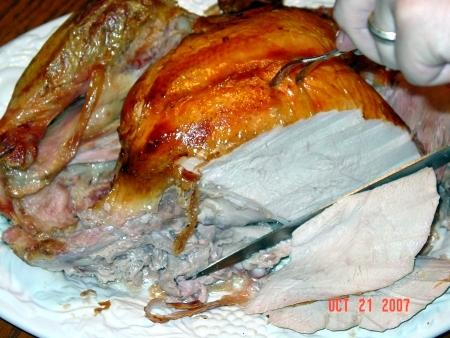
Slice until you finish one side of the breast
Now sit down and eat. And pass me some stuffing.
Enjoy!

This site is protected by copyright and trademark laws under US and International law. © 2002-2024 M. Craig Weaver All rights reserved.
Rendered: Thursday April 25 2024
- Disclaimer:
My opinions are not regulated by any recognized authority - I am neither competent nor authorized to dispense advice of any kind. It is probably best to ignore me.